
 EN
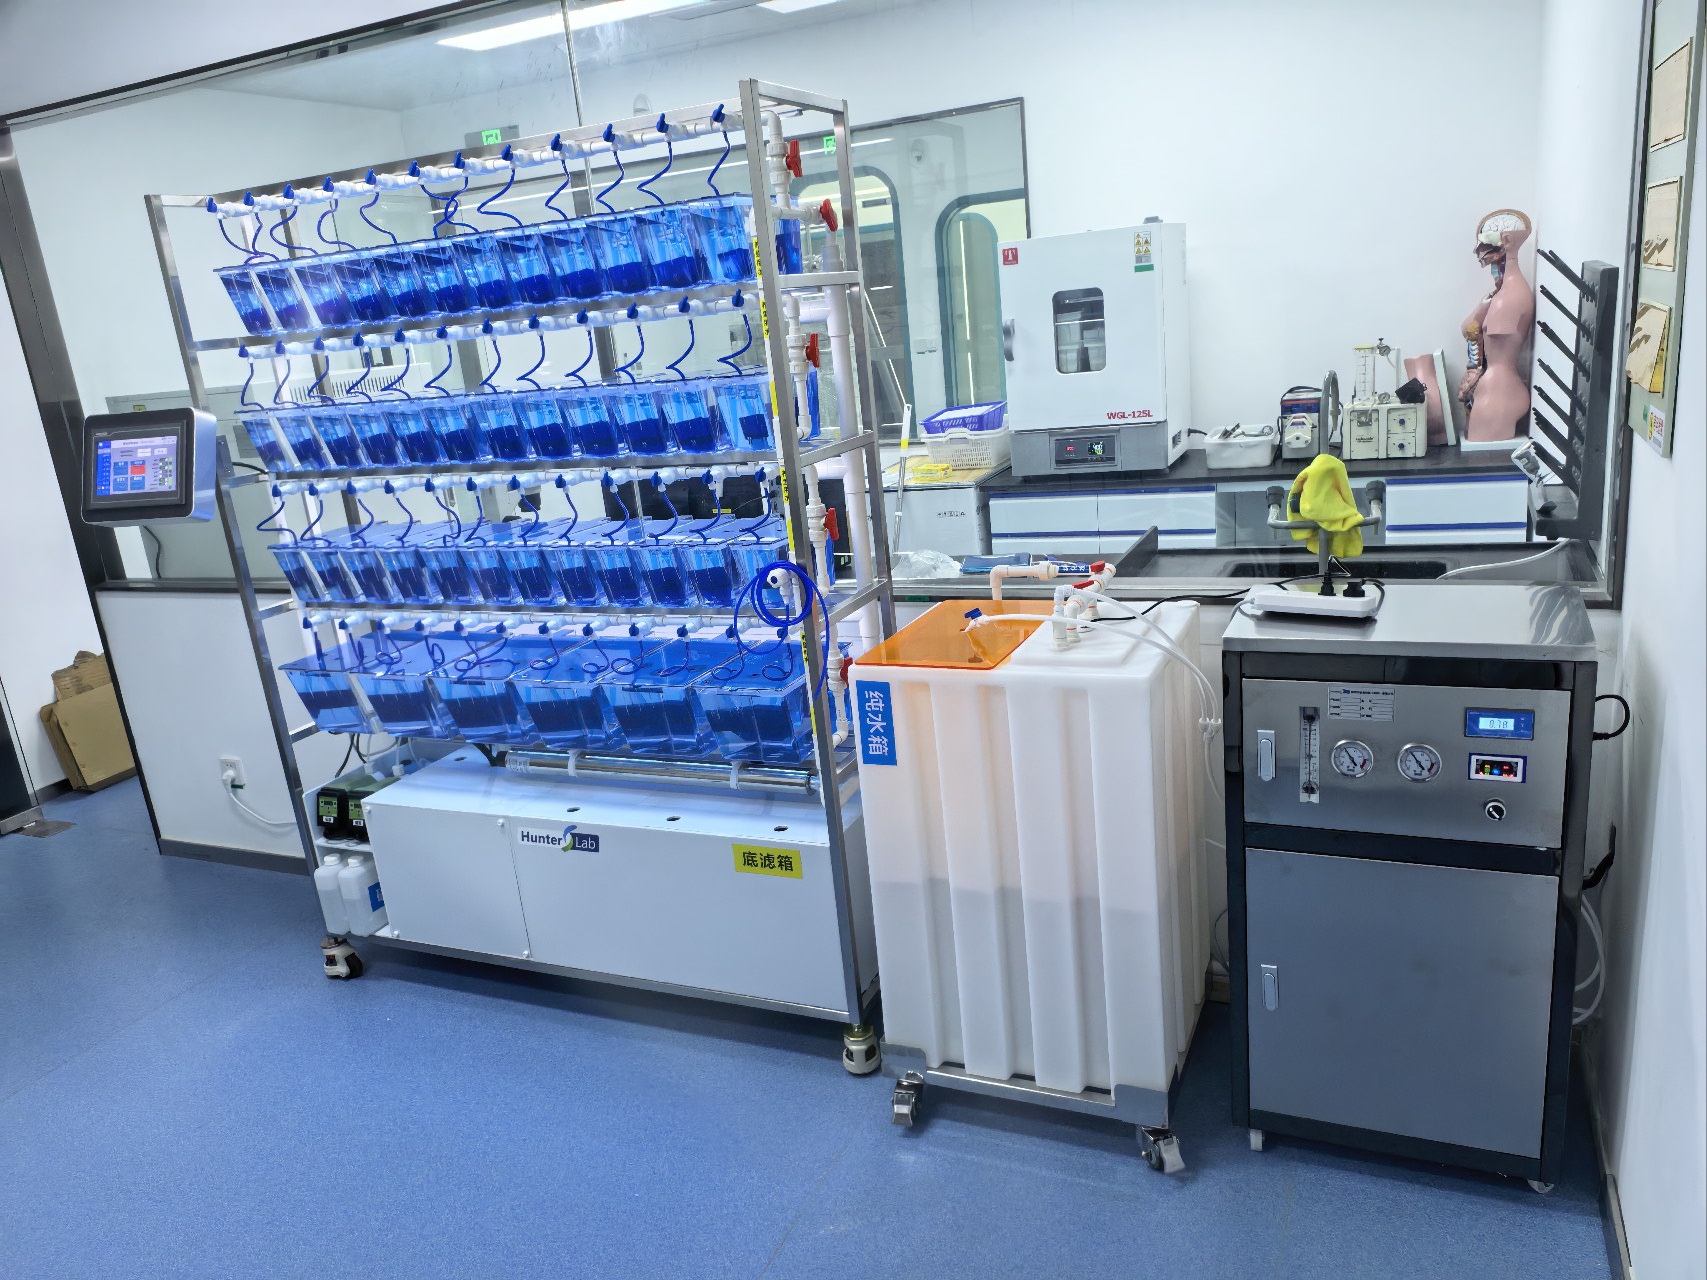
Start with the room, not the rack
A common mistake in facility planning is to order the racks first and then figure out where they fit. That approach almost always wastes space. The room has fixed features such as doors, windows, columns, drains, and electrical panels. Those features dictate what layout is possible. A zebrafish rack layout that ignores them will end up with blocked walkways, inaccessible tanks, or service lines that run across the floor.
The first step is a measured floor plan. Mark every door swing, every column, and every existing utility. Note where the water supply enters and where the drain exits. Note the ceiling height, because it limits how many tiers a rack can have. Note the floor loading capacity, because a fully stocked rack with water is heavy. These details are boring, but they determine whether a layout works in practice.
Map the workflow before placing a single tank
Space efficiency is not just about packing tanks into a room. It is about how people move through the room. A layout that forces staff to walk around a rack to reach a sink wastes time every day. A layout that puts the quarantine area next to the main colony increases the risk of cross contamination.
A workflow map is a simple diagram. Draw the path from the door to the sink, from the sink to the feeding station, from the feeding station to each rack. Draw the path for cleaning, for health checks, and for moving fish. The goal is to minimize unnecessary travel and to keep clean and dirty tasks separate. A zebrafish rack layout that supports the workflow will feel efficient even if it holds fewer tanks than a denser alternative.
Vertical stacking versus horizontal spread
Vertical stacking is the most direct way to increase capacity per square meter. A multi-tier rack uses the same floor area as a single tier but holds several times the tanks. The limit is access. If the top tier requires a ladder, it will be used less often. If the bottom tier is too low, cleaning becomes difficult.
Horizontal spread has the opposite tradeoff. It is easier to access and easier to expand, but it consumes more floor space. For facilities with high ceilings and limited floor area, vertical is usually the better choice. For facilities with low ceilings or a need for frequent access, horizontal may be more practical.
| Layout type | Space efficiency | Access | Maintenance | Expansion |
|---|---|---|---|---|
| Single row along wall | Moderate | Easy | Simple | Limited |
| Double row back to back | High | Moderate | Moderate | Moderate |
| Island layout | High | Moderate | Moderate | Good |
| L shaped | Moderate | Easy | Simple | Limited |
| Modular multi tier | Very high | Requires planning | Structured | Excellent |
The table is a general guide. The best choice depends on the room and the research.
Water, power, and drainage determine what is possible
A rack layout is only feasible if the utilities can reach it. Water supply and drainage need to be close to each rack, or the plumbing becomes expensive and messy. Electrical outlets need to be positioned for pumps, lights, and monitoring equipment. If the room has a single drain in one corner, the layout has to slope toward it or use a collection system.
It also helps to group utility-intensive equipment. Filtration, UV disinfection, and water storage can be placed in a dedicated service area rather than scattered around the room. That keeps the main floor clear for racks and walkways. A zebrafish rack layout that centralizes utilities is easier to maintain and less likely to have leaks in high traffic areas.
Leave room for maintenance and future growth
A layout that fills every square meter leaves no room for maintenance. Staff need space to open lids, remove tanks, and clean floors. Walkways should be wide enough for a cart or a person carrying equipment. A common guideline is to keep at least one meter of clear walkway, though the exact width depends on local safety rules and the size of the equipment.
Future growth is another factor. Research programs change, and a facility that cannot add a rack without rebuilding the room will be constrained. Modular racks with standardized connections make expansion easier. Leaving a small amount of unused floor space, sometimes called a growth zone, can save a lot of disruption later.
A field example from a facility that redesigned its layout
A research institute in southern China had a zebrafish room that felt crowded. The racks were placed along the walls and in the middle of the room, with narrow gaps between them. Staff had to squeeze past each other, and cleaning was difficult. The facility decided to redesign the layout rather than add a new room.
The team started with a measured floor plan and a workflow map. They removed one rack that was rarely used and repositioned the others into a double row back to back. That change opened a clear central walkway and improved access to the sink and the feeding station. The number of tanks did not change, but the room felt larger. The time spent moving between tasks dropped. The redesign cost far less than a construction project.
Where the limits of layout design sit
No layout can overcome a room that is fundamentally too small. No layout can fix a building with inadequate power or drainage. A good design makes the best use of what is available, but it cannot create space that does not exist. It is also worth remembering that layout is not a one-time decision. As research changes, the layout may need to change too. Modular equipment and flexible utility connections make those changes easier.
Hunter Lab (Hunter) builds zebrafish laboratory equipment with attention to the practical details of room planning and daily work. The manufacturing and quality control side supports the consistency that long-term colony management requires. For labs designing a rack layout, that kind of build discipline is part of the foundation.