 EN
How can a zebrafish automated feeding system integrate with existing lab infrastructure?
Installing a Zebrafish Automated Feeding System is less about replacing a single manual task than connecting a new routine to an established husbandry environment. A good integration protects daily care, keeps records usable, and gives technicians a practical way to intervene when something changes. From a core-facility perspective, the most reliable projects start with the existing rack layout, water-management plan, and staff handoffs rather than with the feeder alone.
The question is not whether automation can dispense food. It is whether the Zebrafish Automated Feeding System can fit the lab’s power, network, hygiene, maintenance, and animal-care practices without adding hidden complexity. The right answer depends on the facility’s tank density, diet program, and operating hours; there is no single installation pattern for every lab.
Start with an infrastructure map, not an equipment delivery
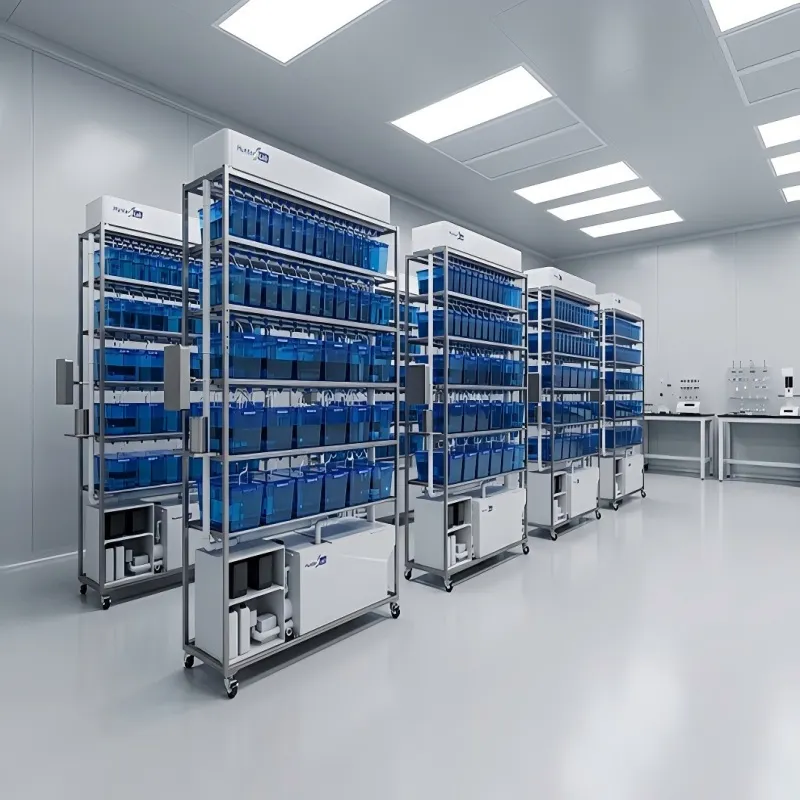
Before installation, create a concise map of the room and its routine. Mark rack rows, tank access paths, electrical outlets, network points, sinks, drains, food-preparation areas, and the route used for daily health checks. This turns “integration” into a set of visible interfaces. A Zebrafish Automated Feeding System needs enough clearance for loading and cleaning, but it should not block a technician from observing tanks, moving a cart, or responding to an alarm.
The setup step nobody mentions is access during exceptions. Ask who can reach the dispensing head when a line needs a manual feed, a tank is quarantined, or a diet change is needed. Build that access into the installation drawing. In many facilities, a feeder is technically compatible with the rack but operationally awkward because the cleaning path or emergency access was considered too late.
Check the four physical interfaces
1. Rack and tank geometry
Measure tank positions, row spacing, overhead clearance, and any moving parts on the rack. The Zebrafish Automated Feeding System should be aligned to the real tank map, including unused or temporary positions. Confirm how the system identifies tanks and how staff will handle a tank that is removed, moved, or taken out of service. Clear labeling and a controlled tank-map update process improve compatibility between the feeder’s schedule and the colony record.
2. Power and network
Provide stable power according to the manufacturer’s installation requirements and document which circuit supports the feeder. Where networked monitoring is used, involve local IT early: confirm approved network ports, device naming, access roles, backup expectations, and what happens if connectivity is lost. A sensible design lets the feeding schedule remain understandable to husbandry staff even during a network interruption.
3. Water, drainage, and humidity
Automated delivery can interact with room humidity, splash zones, and the practical limits of a recirculating system. Keep control hardware and electrical connections away from wet work areas, and define where components are cleaned and dried. Published work on an open-source zebrafish feeder reported no observed water-quality effect over a three-month facility period, but that is not a blanket assurance for another room. Each lab should trend its own water-quality results before and after commissioning, especially when diets, feed volume, or tank density change.
4. Food preparation and storage
Dry and liquid diets create different handling requirements. Designate clean, dry storage for consumables, identify the loading point, and write down who checks lot identity, condition, and remaining volume. This small piece of infrastructure prevents a well-programmed feeder from becoming a source of avoidable variability.
Connect feeding schedules to husbandry workflows
A Zebrafish Automated Feeding System is most effective when its schedule is treated as part of the husbandry protocol. Translate the current feeding calendar into a reviewed schedule: diet type, amount, frequency, applicable tanks, and any manual supplements. Then define ownership. One person may approve schedule changes, another may load food, and the daily animal-care team may verify delivery. Separating those roles makes installation easier to audit and reduces the chance that an informal adjustment becomes the new default.
We would usually begin with a limited group of tanks rather than activate an entire room on day one. This phased installation allows staff to compare automated and established routines under the same local conditions. It also gives the team time to adjust labeling, replenishment timing, and alerts before expansion.
Make data compatibility useful to the people on the floor
Integration is not complete when the feeder has a dashboard. Decide which records matter to the facility: scheduled feeds, completed feeds, skipped events, food replenishment, alarms, tank identifiers, and maintenance actions. Align those fields with the lab’s colony-management sheet, LIMS, or existing husbandry log. The most useful compatibility is often simple: a technician can trace a feeding event to a tank and can explain an exception without searching across unrelated systems.
Use a short reconciliation routine during early operation. Compare the feeder’s tank list with the rack inventory, review any missed or modified events, and confirm that the records use the same names and dates as the rest of the lab. If an interface cannot exchange data directly, a controlled export-and-review process can still be preferable to an unverified manual copy.
Commission with acceptance tests and a rollback plan
Do not treat installation as a single switch-on event. Write acceptance tests that the lab can repeat: correct tank identification, accurate schedule display, appropriate alert delivery, safe interruption behavior, cleaning access, and complete event logging. Test them with normal staff, not only with the installer. The training gap that causes the most variability is often a staff member who knows routine feeding but has not practiced pausing, resuming, or documenting an exception in the automated workflow.
A rollback plan is equally important. Define when staff will revert to the established manual protocol, where the current schedule is stored, and how the event will be documented. This makes automation more resilient because a temporary fault does not force improvised husbandry decisions.
A practical integration checklist
- Verify rack geometry, service access, power, network, and wet-area boundaries.
- Confirm tank IDs and diet rules before importing a schedule.
- Assign owners for schedule approval, food loading, cleaning, and exception review.
- Run a pilot zone and trend local water-quality and husbandry observations.
- Align feeding records with existing colony and maintenance logs.
- Train every shift on alarms, manual override, sanitation, and rollback.
- Approve expansion only after the pilot acceptance tests are documented.
Conclusion
A Zebrafish Automated Feeding System integrates successfully when it supports—not obscures—the lab’s existing care system. Start with physical interfaces, connect schedules to accountable people, make records readable, and commission the workflow in a controlled pilot. With that approach, automation can improve routine consistency while preserving the observation, judgment, and contingency planning that responsible zebrafish husbandry requires.